 Android app
Pocket NAS
Turn your Android phone into a small, secure network drive. Plug in an SSD or use the phone's own storage, and read and write your files from any computer, tablet or phone — in a web browser or as a mapped network drive.
What the app does
Pocket NAS makes your Android device work as a simple NAS (network-attached storage). Connect a USB SSD or hard drive to the USB-C port, or use the phone's internal storage. Choose which folders to share and tap Start. Windows, macOS, Linux, iPhone/iPad, Android and Chromebooks can then read and write those files.
It uses WebDAV, a standard file-sharing protocol that Windows, macOS and Linux support out of the box, plus a built-in file manager in the browser. Nothing extra needs to be installed on your computer.
Two ways to reach your files
🗂 In any web browser
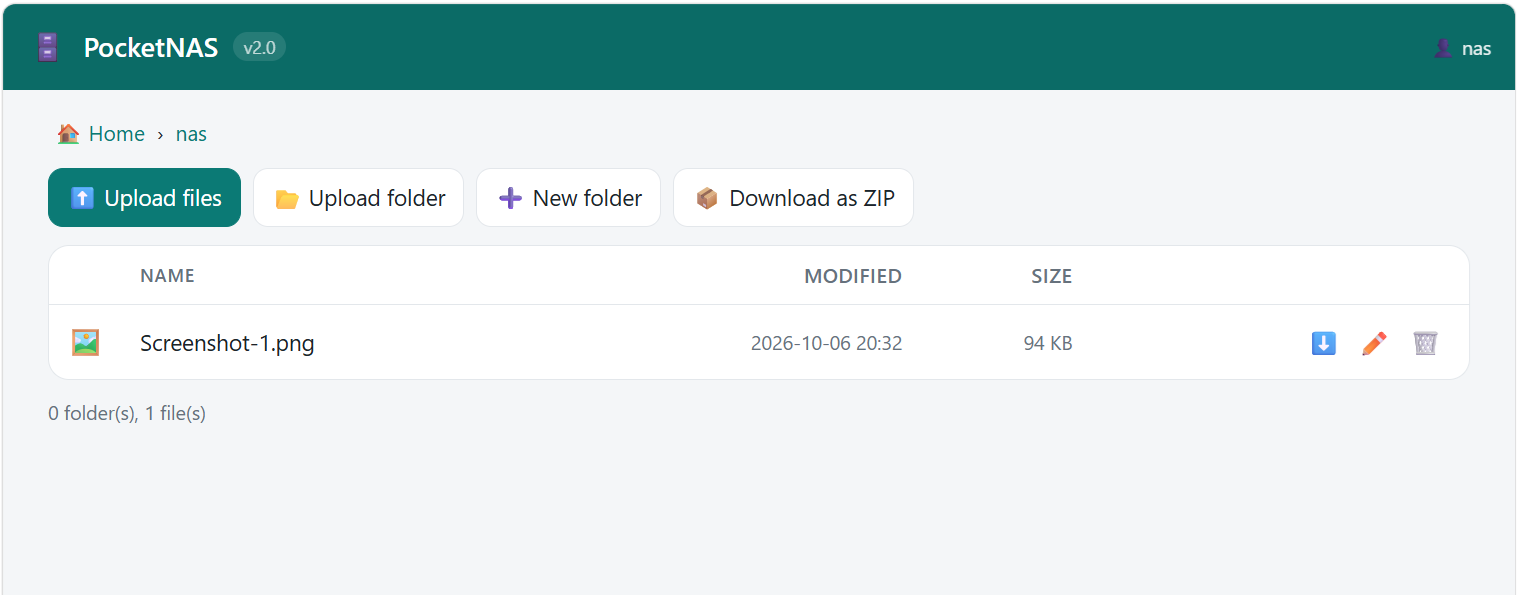
Open the address shown in the app and log in. Browse, download and upload files (including whole folders by drag & drop), create, rename or delete folders, and download a folder as a ZIP.
💽 As a network drive
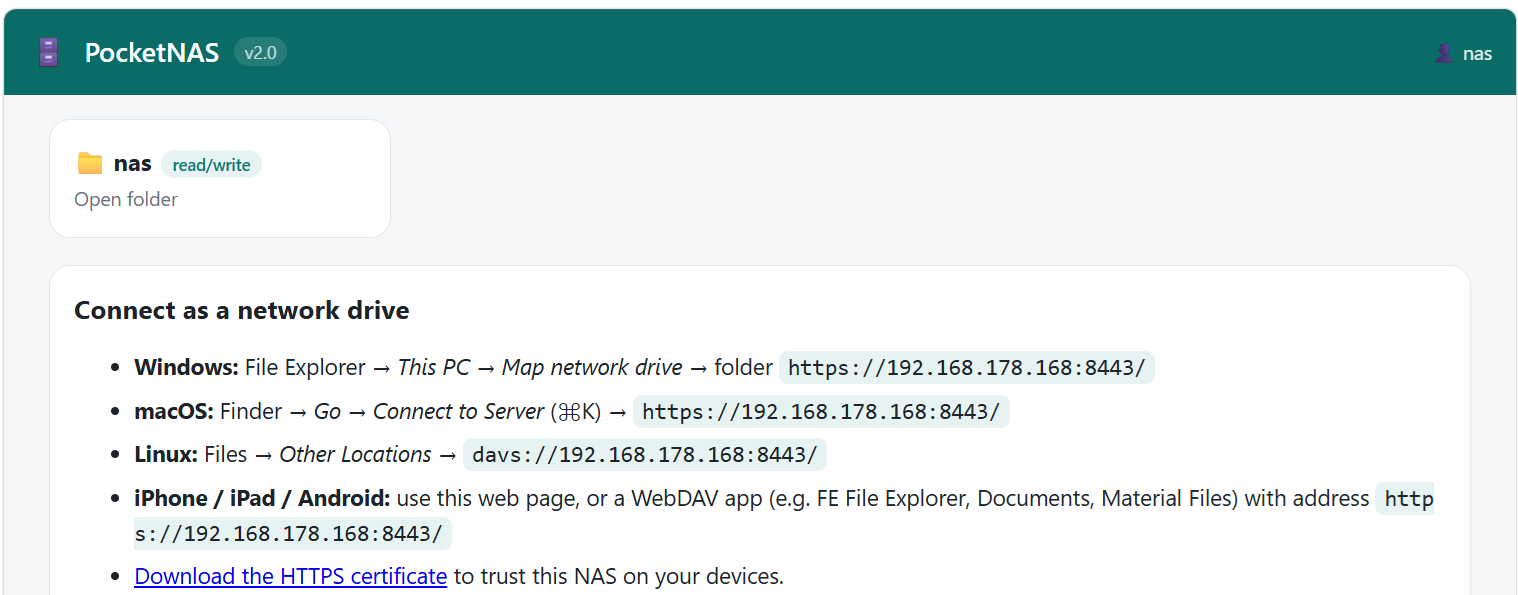
Map the NAS as a drive letter in Windows File Explorer, connect from the macOS Finder or a Linux file manager, or use any WebDAV app on a phone or tablet. The start page shows the exact steps for each system.
Ways to connect
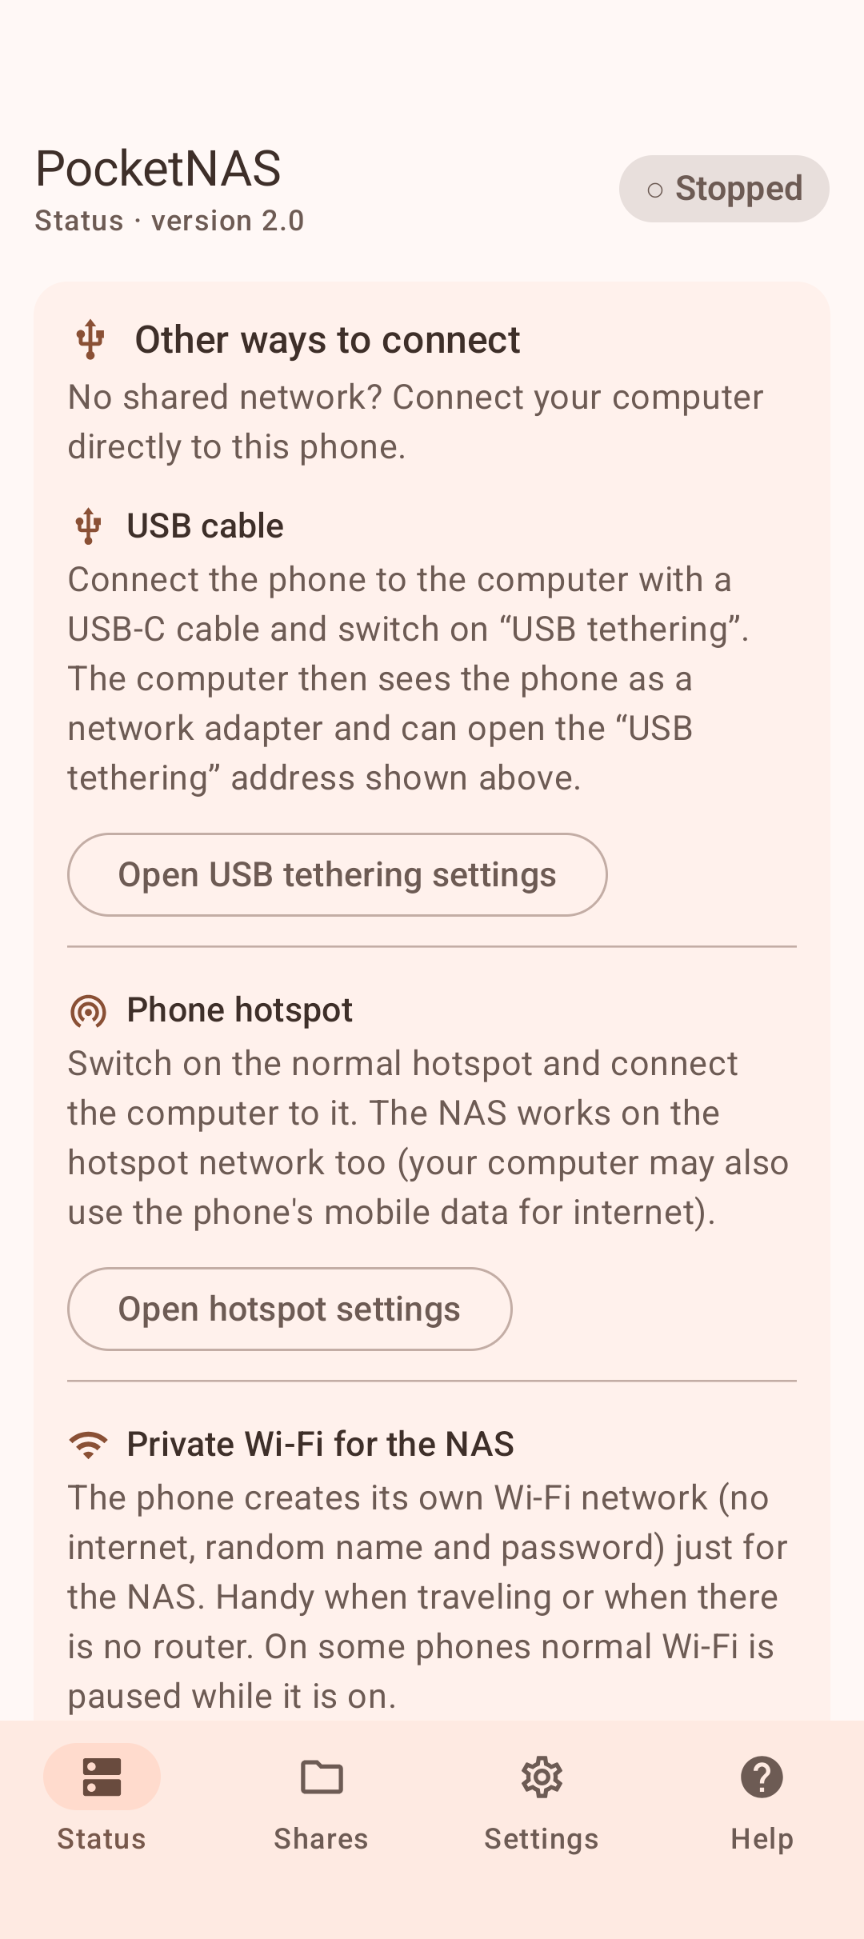
- Wi-Fi or Ethernet — through your home network (Ethernet via a USB-C hub with a network port).
- USB cable — with USB tethering, the computer gets a direct network connection to the phone.
- The phone's hotspot — connect other devices to the phone's own hotspot.
- Private Wi-Fi — the app creates its own Wi-Fi network without internet, only for the NAS, with a QR code to join it quickly.
Highlights
- Share a USB drive, SD card or a folder on internal storage (for example Download/nas), or several at once
- Secure login: Digest authentication over HTTP (the password never crosses the network in plain text), and optional HTTPS that encrypts everything
- "Local network only" by default: connections from outside your home network are refused
- Optional read-only guest account, read-only mode and a list of allowed devices
- Brute-force protection: a device is blocked for 5 minutes after 8 wrong passwords
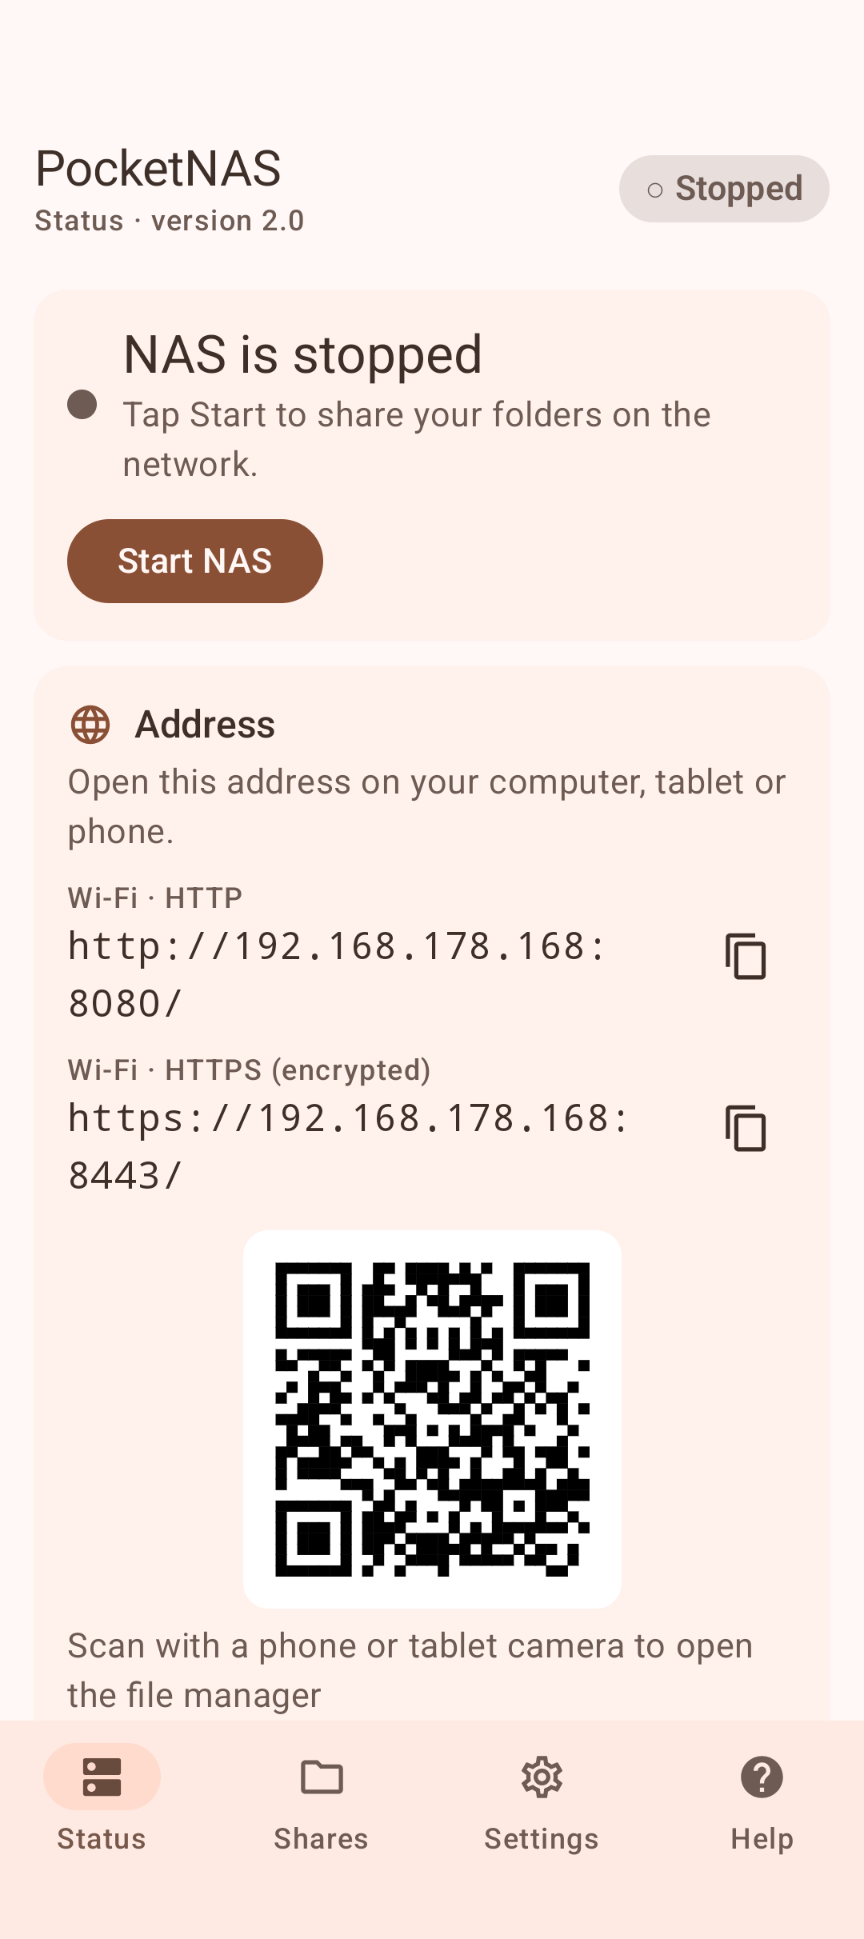
- QR code with the address, an activity log and a file browser inside the app
- Keeps running in the background with the screen off, and can start again after a reboot
- Material 3 design with light and dark themes; adapts to phones, tablets, foldables and Chromebooks
Download
Pocket NAS is not available in the Google Play Store. You can download the APK directly below and install it manually.
By downloading you agree to the Privacy Statement & Disclaimer. Use is entirely at your own risk.
How to install an APK from outside the Play Store
- Tap the download button above and wait for pocketnas.apk to finish downloading.
- Open the file (via your notification shade or the Files app).
- Android will ask permission to install unknown apps. Tap Settings and enable "Allow from this source" for your browser or file manager.
- Go back and tap Install.
- Open Pocket NAS when installation completes.
Installing apps from outside the Play Store is a normal Android feature. You can turn the "unknown sources" permission back off afterwards if you prefer.
User manual
The app is in English. It has four tabs: Status, Shares, Settings and Help.
1. Connect your drive (optional)
Plug your drive into the USB-C port, directly or through a hub. A 2.5" or NVMe SSD usually works straight away; a 3.5" hard drive needs a hub or enclosure with its own power supply. You can also skip this and share a folder on internal storage.
2. Add a shared folder
Open the Shares tab and tap USB drive / SD card or Internal storage. In the Android folder picker, tap ☰, choose your drive and pick the whole drive or a folder on it. Tap Use this folder and then Allow. The app only gets access to the folders you pick.
3. Start the NAS
Go to Status and tap Start NAS. Allow notifications, and under Recommended tap Allow to exclude the app from battery optimization. The Status screen now shows the address (for example http://192.168.1.23:8080/), a QR code, the user name and the password.
4. Connect from your devices
Use the address from the app on your other devices (see the table below). The Help tab has the same instructions, filled in with your own address.
- User name / Password: the main account with read and write access. Generate creates a strong password.
- Guest account: read-only access, only to shares where Guest access is on.
- Read-only mode: makes all shares read-only for a while.
- Local network only: (recommended, on by default) refuses connections from outside your local network.
- Allowed devices: optionally only allow specific IP addresses or ranges.
- HTTP / HTTPS and ports: 8080 (HTTP) and 8443 (HTTPS) by default.
- Announce on the network: makes the NAS easy to find via Bonjour/mDNS.
- Available on: choose per connection type (Wi-Fi, Ethernet, hotspot, USB tethering, VPN…) where the NAS can be reached.
- Fixed NAS address: helps you set up an address that never changes.
- Keep processor / Wi-Fi awake and Start after reboot.
Connecting from your devices
Replace 192.168.1.23 with the address shown in the app.
| Device | How to connect |
|---|---|
| Any device (browser) | Open http://192.168.1.23:8080/ in Chrome, Edge, Safari or Firefox and log in. |
| Windows 10/11 | File Explorer → right-click This PC → Map network drive → enter http://192.168.1.23:8080/ → tick Connect using different credentials → log in. |
| macOS | Finder → Go → Connect to Server (⌘K) → http://192.168.1.23:8080/ → Registered User. |
| Linux | GNOME Files: Other Locations → dav://192.168.1.23:8080/. KDE Dolphin: webdav://192.168.1.23:8080/. Also works with davfs2 and rclone. |
| iPhone / iPad | The iOS Files app does not support WebDAV, so use Safari, or a WebDAV app such as FE File Explorer, Documents or Owlfiles. |
| Android / Chromebook | A web browser, or a file manager with WebDAV support (for example Material Files, Solid Explorer or CX File Explorer). |
reg add HKLM\SYSTEM\CurrentControlSet\Services\WebClient\Parameters /v FileSizeLimitInBytes /t REG_DWORD /d 4294967295 /fIf mapping the drive doesn't work, check that the WebClient service is running. For files over 4 GB, use the browser or a client such as WinSCP or Cyberduck.
Without a router
- USB cable: connect phone and computer with a USB-C data cable and turn on USB tethering on the phone (Status → Open USB tethering settings). Use the address labeled USB tethering. Works on Windows and Linux; on macOS only with phones that use the newer NCM mode.
- Hotspot: turn on the phone's hotspot and connect the other device to it. Use the address labeled Hotspot. Works on every system, including iPhone/iPad.
- Private Wi-Fi: Status → Create private Wi-Fi. The phone creates its own network without internet and shows its name, password and a Wi-Fi QR code.
Note: USB tethering also shares the phone's mobile data with the computer (that is how Android works). The NAS itself does not use the internet.
How your files are protected
- Local only. The app only listens on your local network and never makes outgoing connections. By default, clients from outside the local network are refused.
- Safe login. HTTP uses Digest authentication, so the password is never sent in readable form. HTTPS encrypts everything, including the files.
- Folders stay closed off. Clients can never reach anything outside a shared folder, and Android only gives the app access to the folders you choose — no "all files access" needed.
- Browser protection. Cross-site requests are blocked, and HTML/SVG files from the drive are shown in a sandbox.
- Encrypted passwords. Stored with AES-256-GCM using a key in the Android Keystore. Cloud backup and device-to-device transfer are disabled.
- Own HTTPS certificate. Created on the phone itself. Browsers will warn because it isn't from a known issuer; compare the SHA-256 fingerprint with the one in Settings, or install the certificate as trusted.
- Activity log in memory only. It is never saved.
Permissions this app requests
We believe in being transparent about every permission. Here is exactly what the app asks for and why:
| Permission | Why it is needed |
|---|---|
| Internet | Android has no separate "local network" permission: this permission is required to open any network port, even one that only listens on your home Wi-Fi. The app never connects to the internet itself. |
| Network & Wi-Fi state | To show the phone's own address and react when the network changes. |
| Foreground service & notifications | To keep running in the background, with a visible notification showing the address and a Stop button. |
| Wake lock | To keep the processor and Wi-Fi awake during transfers. |
| Ignore battery optimizations | To ask whether the app may be excluded from battery optimization, so Android doesn't stop the NAS. |
| Run at startup | Optional: start the NAS again after a reboot. |
| Change Wi-Fi state | To create the private Wi-Fi (local-only hotspot). |
| Nearby devices (Android 13+) | Required by Android for the private Wi-Fi; flagged "never for location". Only asked when you use it. |
| Location (Android 8–12 only) | Required by Android for the private Wi-Fi on those versions. The app never reads your location; only asked when you use it. |
Privacy & cost — in plain terms
- No usage data collected. The app gathers no analytics or telemetry of any kind.
- No personal data requested. No account with us, no sign-up; the only login is the one you set for your own NAS.
- No cookies, no tracking. This website sets none either.
- No internet or cloud. Your files go directly between your own devices and are never sent to us or anyone else.
- No payment, ever. The app is completely free, with no ads and no in-app purchases.
For the full statement, see Privacy & Disclaimer.
Responsible use & your responsibility
Pocket NAS is a hobby and educational project, not a replacement for a professional storage or backup solution. Always keep a backup of important files, and only share folders on networks you trust. Never open a port in your router to reach the NAS from the internet; for safe remote access, use a VPN such as Tailscale.
The app is provided "as is", for learning and experimentation, without any warranty. Please read the full Privacy Statement & Disclaimer before use — by installing or using the app you accept those terms.
Images