 Android app
Media Viewer
A private, offline photo and video viewer. Browse your folders as collections, swipe and zoom through photos and videos full screen, and make it your default viewer — with no internet access at all.
What the app does
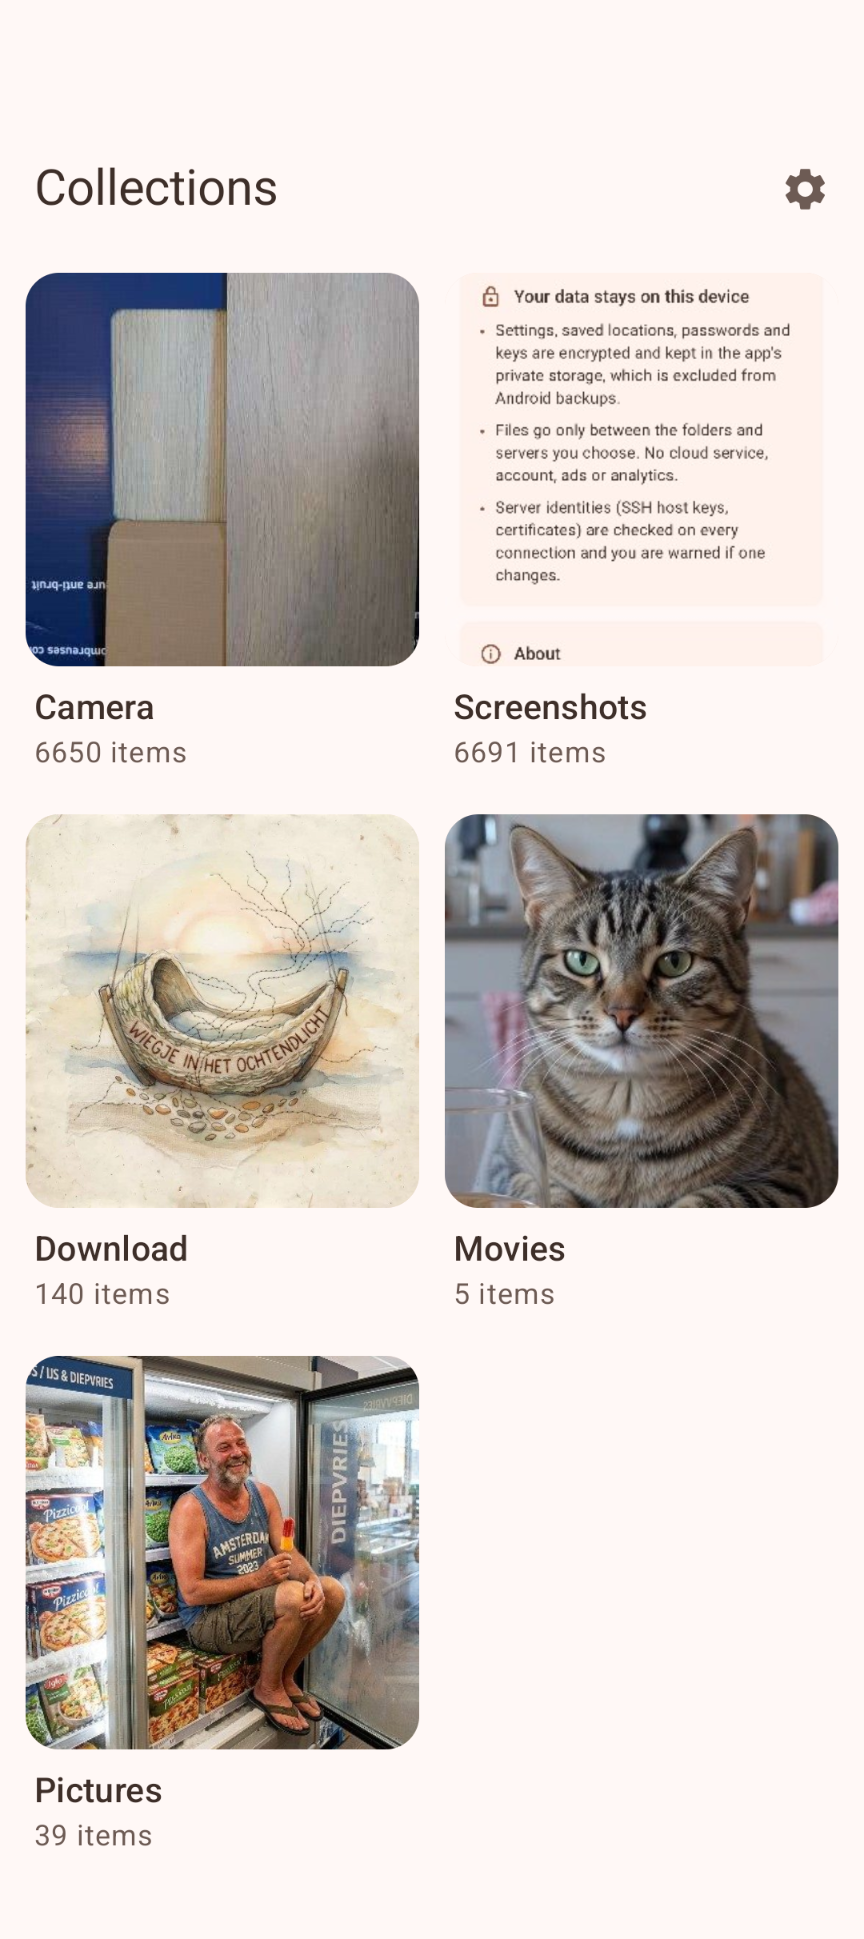
Media Viewer shows the photos and videos stored on your phone, SD card or USB drive. Start it yourself and it opens on a Collections page with a cover picture and item count for each folder, similar to "Collections" in Google Photos. Set it as your default viewer, and every photo or video you open from another app (for example a file manager) appears full screen right away.
It has no internet access, runs nothing in the background and, by default, uses no permissions at all: you decide which folders it may read.
Made for quick browsing
🖼 Collections
Camera, Screenshots, Download, Movies, Pictures and Documents are there from the start (when they exist on your phone). Add any other folder, remove the ones you don't need, and restore the defaults later.
👆 Simple gestures
Tap the left or right side of the screen for the previous or next item, swipe in from an edge to go back to the folder, pinch to zoom up to 8x and drag to look around.
🎬 Videos too
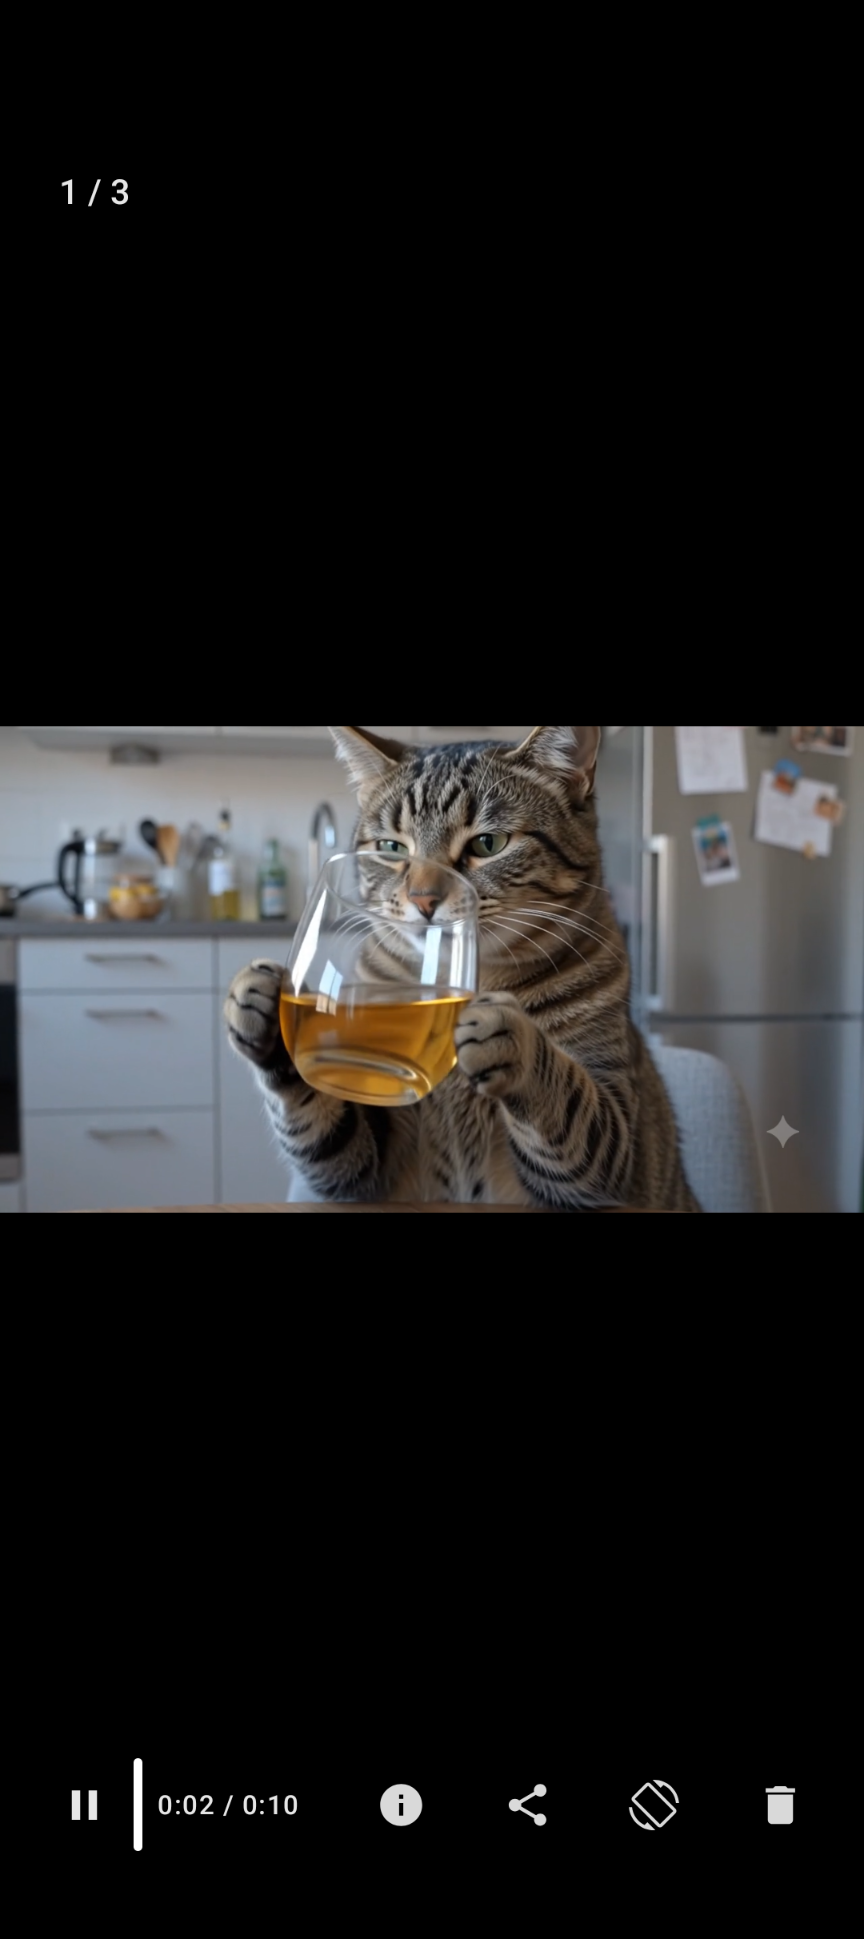
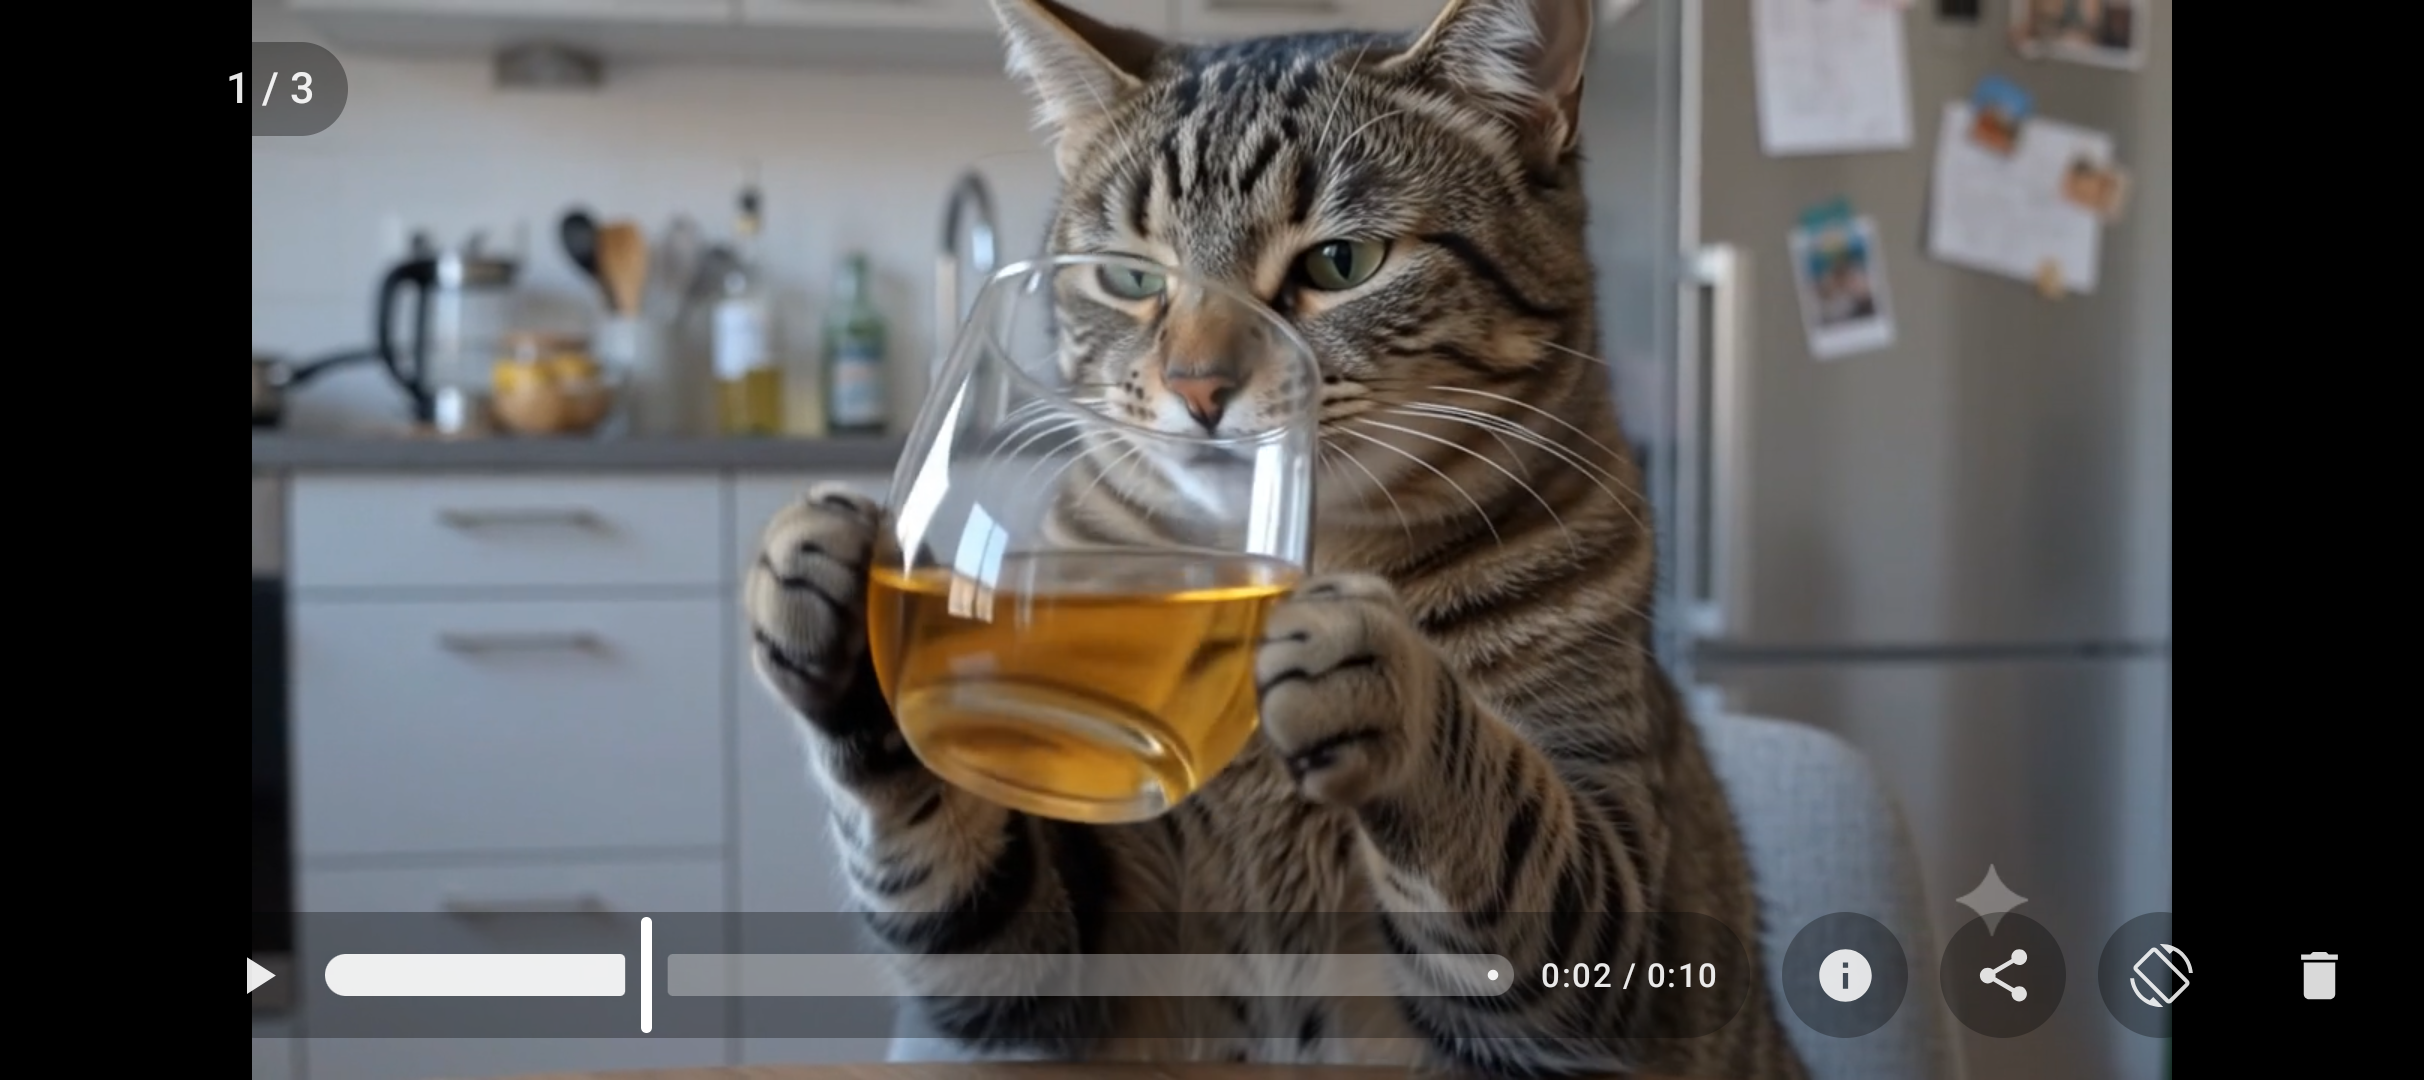
Videos start playing automatically, with play/pause and a seek bar. They can be zoomed and moved exactly like photos, and pause as soon as you leave the app.
📂 Your default viewer
Open a photo from a file manager and it is shown full screen immediately. If it's in one of your collections, you can flip through the whole folder.
Highlights
- Fast pages: covers, counts and folder lists are remembered, and thumbnails are made once and kept in a private cache, so scrolling through thousands of photos doesn't leave empty squares
- A fast-scroll handle in large folders: drag it to jump to any month
- Three icons in the viewer: Share, Rotate (portrait/landscape) and Delete (after confirmation)
- Animated GIF and WebP, HEIC/HEIF, and every video format your phone supports
- Optional All files access to use any folder, including Download and the root of an SD card
- Material 3 design with light and dark themes and dynamic colors (Android 12+); more columns on landscape screens, foldables and tablets
Download
Why Media Viewer isn't on the Google Play Store
Google currently enforces highly demanding and complex requirements to publish new apps (such as mandatory closed testing phases with at least 20 people for 14 days, rigorous identity verification, and heavy administrative overhead). Because we build apps purely for our own enjoyment and want to keep it simple, we prefer to share the app with you directly.
How to Install the App
- Directly on your phone: Open the downloaded file. If prompted, allow your browser or file manager to "Install unknown apps" from outside the Google Play Store. Google started blocking this way of installing APK files.
- Via your computer: Connect your phone to your computer with a USB cable and install the app using Android Debug Bridge (ADB).
By downloading you agree to the Privacy Statement & Disclaimer. Use is entirely at your own risk.
How to install an APK directly on your phone
- Tap the download button above and wait for mediaviewer.apk to finish downloading.
- Open the file (via your notification shade or the Files app).
- Android will ask permission to install unknown apps. Tap Settings and enable "Allow from this source" for your browser or file manager.
- Go back and tap Install.
- Open Media Viewer when installation completes.
Installing apps from outside the Play Store is a normal Android feature. You can turn the "unknown sources" permission back off afterwards if you prefer.
How to install an APK via your computer
The cleanest, safest, and most secure way to install an APK file—without modifying your phone's mobile security settings or enabling "Unknown Sources"—is via ADB (Android Debug Bridge) from your computer. This is an official command-line utility supplied by Google for Android developers.
Step 1: Download ADB on your computer (The fastest way)
You do not need to install the massive Android Studio suite. Google provides a lightweight, standalone package called Platform-Tools.
- Windows: Download the official Android SDK Platform-Tools for Windows.
- Mac / Linux: Download the zip package above or install it instantly via your terminal line:
- Mac (via Homebrew): Run
brew install android-platform-tools - Linux (Ubuntu/Debian): Run
sudo apt install adb
- Mac (via Homebrew): Run
Note: If you downloaded the ZIP file (Windows/Mac), extract it into an easy-to-reach directory, such as C:\platform-tools or your Desktop.
Step 2: Prepare your Android phone
- Open the Settings app on your phone.
- Go to About phone (or System > About).
- Tap Build number 7 times rapidly until a notification pop-up says: "You are now a developer!".
- Return to the main Settings menu, open the new Developer options panel, and turn on USB debugging.
Step 3: Install the APK file
- Connect your phone to your computer using a USB cable.
- Look at your phone's screen: a prompt will ask "Allow USB debugging?". Check the option for “Always allow from this computer” and tap Allow.
- Move your downloaded APK file directly into the folder where you extracted the platform-tools files.
- Open Command Prompt (CMD) on Windows or Terminal on Mac/Linux, and change directories to that folder (e.g., on Windows, type:
cd C:\platform-tools). - Run this command to verify your computer properly detects your device:
(If you see a serial number followed by the word 'device', you are connected successfully!)adb devices - Run the installation script command:
adb install mediaviewer.apk
When the terminal returns a Success message, the app is fully installed on your device and ready to launch!
User manual
The app is in U.S. English. It has three screens: Collections, the folder grid and the full-screen viewer, plus Settings.
1. First start
Open Media Viewer. The Collections page shows the default collections that exist on your phone, with a lock and "Tap to allow access". Tap a collection: the Android folder picker opens at that folder. Tap Use this folder and then Allow. The collection now shows a cover picture and the number of items. You only need to do this once per collection; access stays after a restart.
2. The Collections page
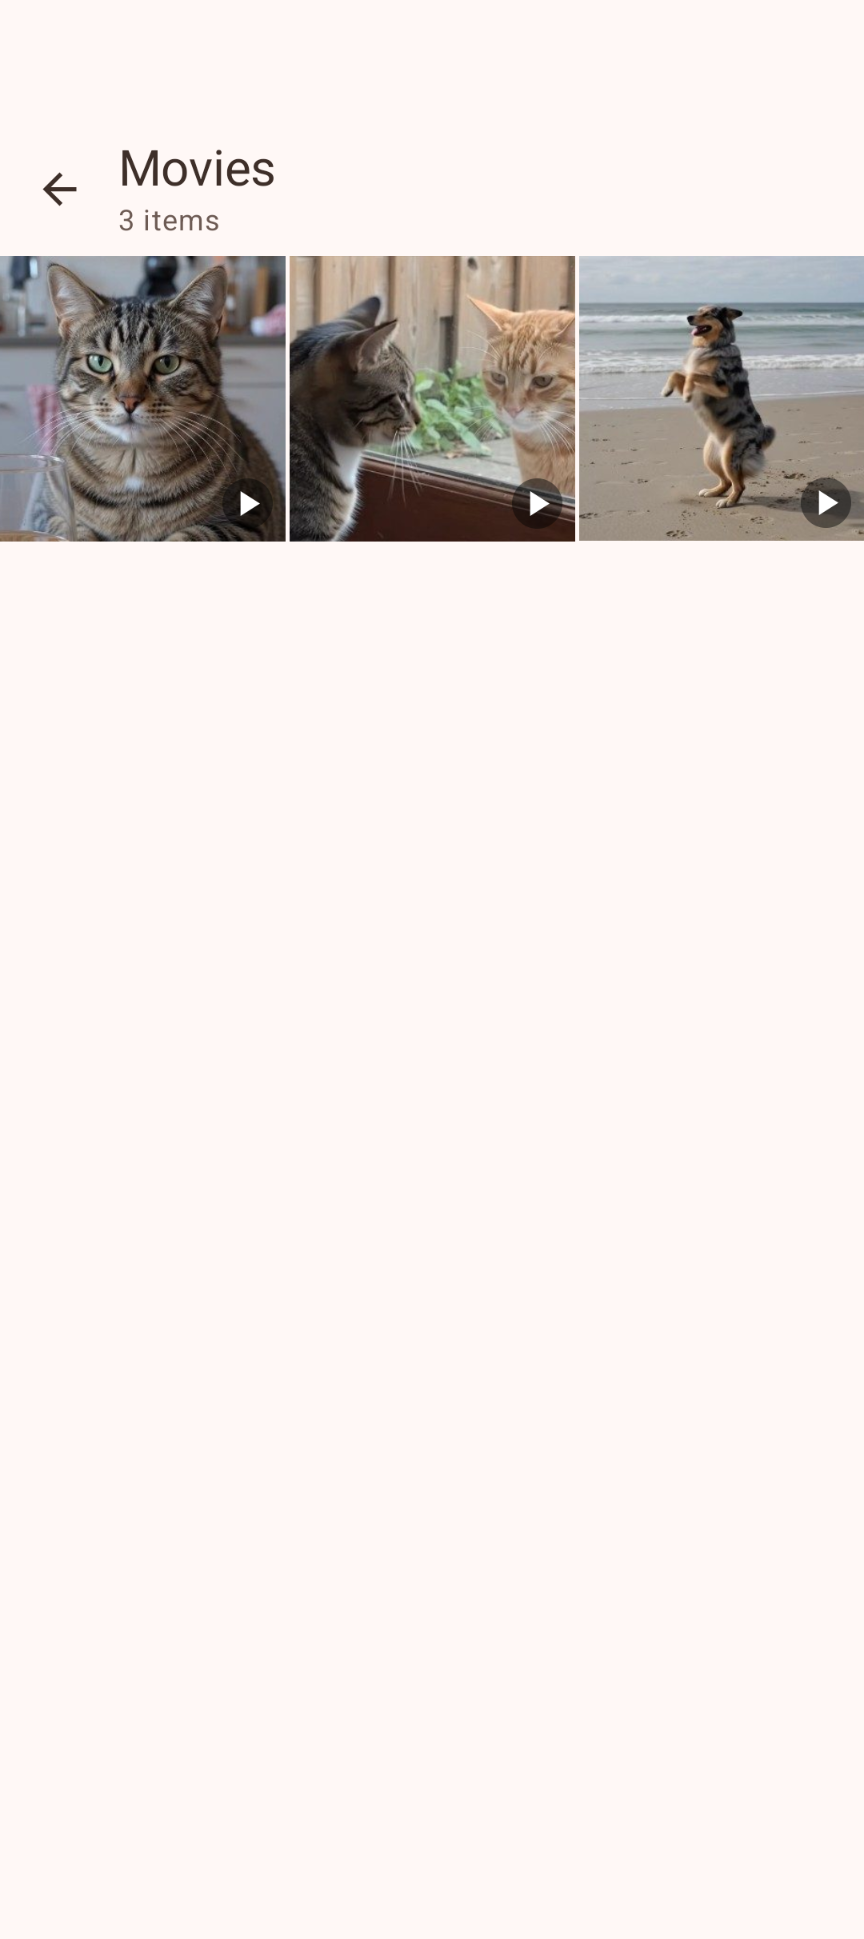
- Open a collection: tap it. A grid of its photos and videos appears, newest first.
- Add a collection: tap Add collection (bottom right), choose any folder on internal storage, an SD card or a USB drive, and tap Use this folder → Allow.
- Remove a collection: tap ⋮ on the collection → Remove from collections. No files are deleted.
- A lock appears again: the folder was moved or renamed, or the SD card was removed. Tap it to choose the folder again.
- ⚙ opens Settings; ⋮ in the top bar has Restore default collections and About.
3. The folder grid
Tap a thumbnail to open it full screen; videos show a small ▶ badge. In large folders a handle appears on the right edge while you scroll: drag it to jump through the folder, with a bubble showing the month and year. Tap ← or use the Back gesture to return to Collections.
4. The full-screen viewer
| Gesture / button | Result |
|---|---|
| Tap the left / right side | Previous / next photo or video in the folder |
| Swipe left / right (not zoomed) | Next / previous photo or video |
| Swipe in from the left or right edge | Close the viewer: the folder grid appears, scrolled to this item |
| Tap the middle | Show or hide the on-screen icons |
| Pinch with two fingers | Zoom in or out (1x–8x) |
| Drag while zoomed | Move around the zoomed photo or video |
| Double tap | Zoom in 2.5x on that spot; double tap again to zoom out |
| Share icon | Send the photo or video to an app you choose |
| Rotate icon | Switch between portrait and landscape; stays locked until you leave the viewer |
| Delete icon | Asks for confirmation, then deletes the file permanently and shows the next item |
| Back | Return to the folder grid (or to the app you came from) |
The counter at the top left (for example 12 / 240) shows the position in the folder. Small dead zones between the left, middle and right tap areas prevent accidental jumps.
5. Settings and All files access
Open Settings with the ⚙ icon. The All files access switch is off by default. Turn it on to pick folders in Media Viewer's own folder browser instead of the Android folder picker: then every folder can be added, including Download itself and the root of internal storage or an SD card, locked default collections unlock automatically, and previous/next works for photos opened from any folder.
- Tap the All files access switch and then Open settings.
- Turn on Allow access to manage all files for Media Viewer.
- Press Back. The switch is now on. (On Android 10, tap Continue and Allow instead.)
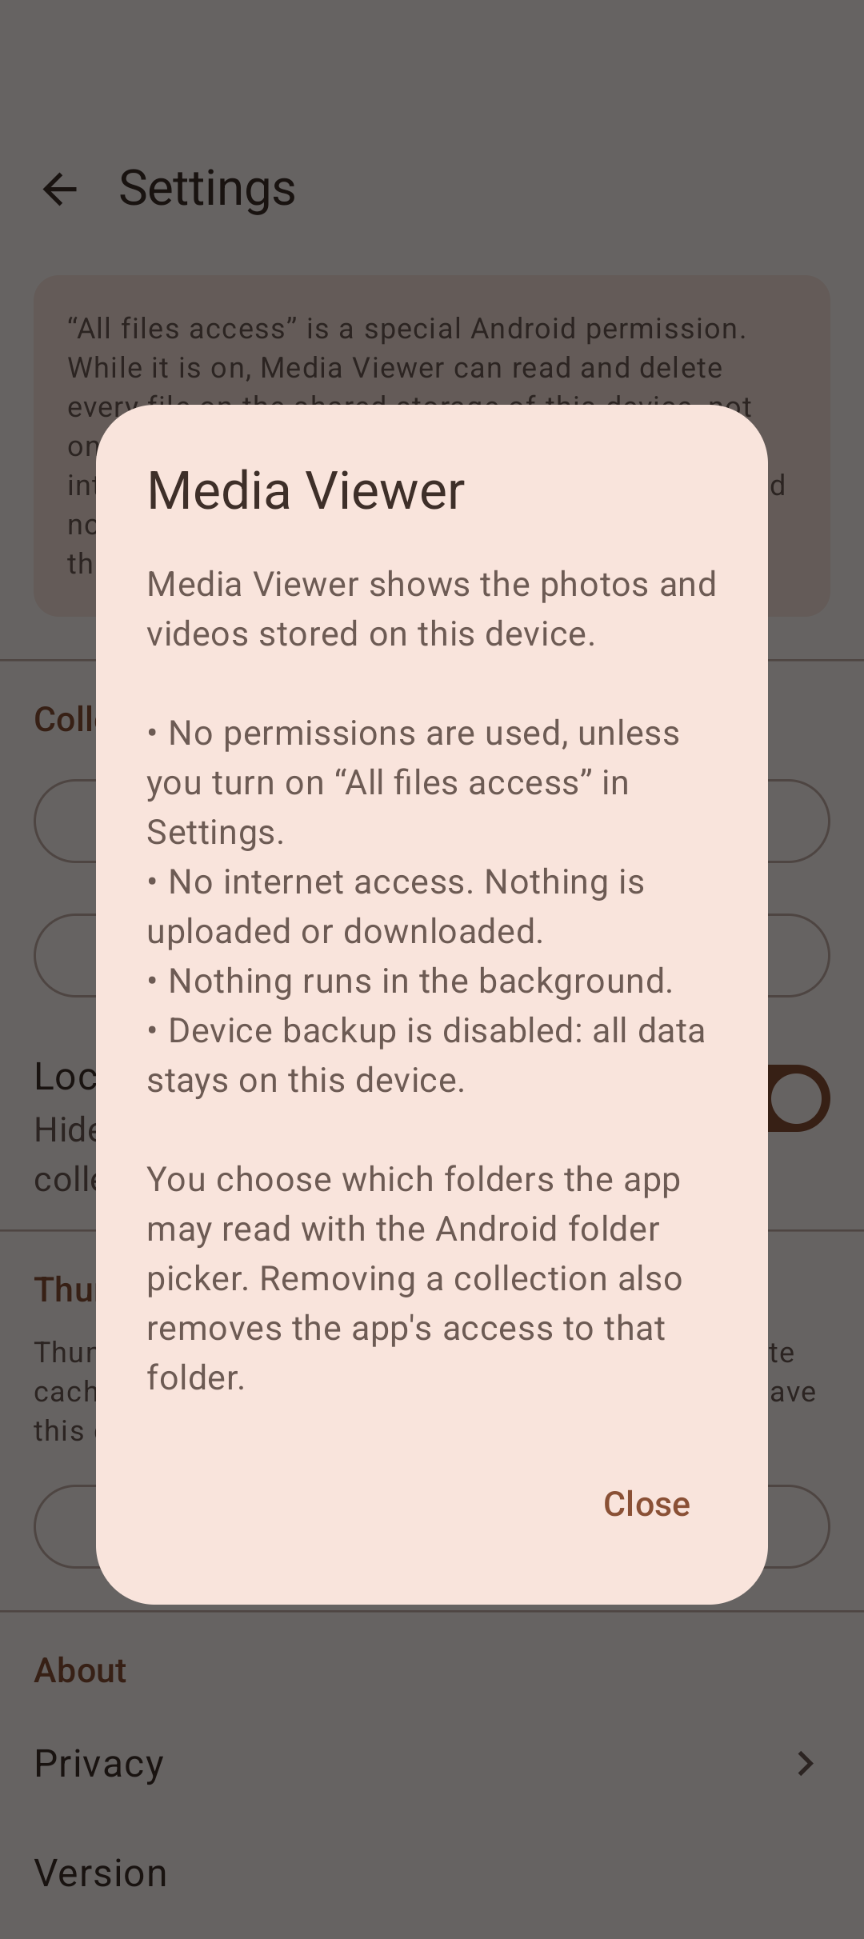
To turn it off again, follow the same steps. Collections added with the folder browser then show a lock; tap them to give access with the folder picker instead. Settings also has Clear thumbnail cache, Restore default collections, a short privacy summary and the app version.
Make Media Viewer your default viewer
Android has no separate "default gallery" setting: the default is chosen the first time you open a photo or video.
- Open a file manager (for example Files by Google or your phone's My Files).
- Tap a photo. When Android asks which app to use, pick Media Viewer and tap Always.
- Tap a video and again choose Media Viewer → Always. Photos and videos are separate choices.
If Android doesn't ask, another app is already the default. Clear its default first, then open a photo again:
| Phone | Where to clear the default |
|---|---|
| Google Pixel / stock Android | Settings → Apps → (current app) → Open by default → Clear default preferences |
| Samsung (One UI) | Settings → Apps → (current app) → Set as default → Clear defaults |
| Xiaomi / Redmi / POCO | Settings → Apps → Manage apps → (current app) → Clear defaults |
| OnePlus / OPPO / realme | Settings → Apps → App management → (current app) → Open by default → Clear defaults |
| Motorola | Settings → Apps → (current app) → Open by default → Clear default preferences |
To stop using Media Viewer as the default: Settings → Apps → Media Viewer → Open by default → Clear defaults.
Good to know
- Only the folder itself is shown, not its sub-folders. Add sub-folders as separate collections if needed.
- Photos opened from other apps: previous/next only works when the file's folder is one of your collections (or inside one), or with All files access on. Files shared by cloud apps such as Google Photos are shown one at a time.
- Deleting a file opened from another app works for files in your collections and the Android media library. Some apps only give read access; the app then explains that the file can't be deleted.
- Android/data and Android/obb stay hidden by Android, even with All files access.
- Rotate on tablets: from Android 16, Android ignores orientation requests on large screens. Turn the device instead.
- Videos use the codecs built into your phone; rare formats may not play.
- A new photo doesn't appear? Leave the app and come back, or open the folder again; lists refresh automatically.
Permissions this app requests
We believe in being transparent about every permission. Media Viewer has one optional permission, off by default. It is only active after you turn it on in Android's settings:
| Permission | Why it is needed |
|---|---|
| All files access (Android 11+, optional) | Lets you add any folder in Media Viewer's own folder browser, including Download and the root of a storage. The app only shows the folders you add as collections, and only deletes a file when you tap Delete and confirm. |
| Read/write storage (Android 10 only, optional) | The same as above on Android 10, which has no "All files access" page. |
Privacy & cost — in plain terms
- No internet access. The app has no internet permission, so Android blocks all network traffic. Nothing is uploaded or downloaded.
- No usage data collected. No analytics, telemetry, logs or advertising.
- No personal data requested. There are no accounts, no sign-up, no login.
- No cookies, no tracking. This website sets none either.
- Nothing runs in the background. No services, no background battery use; the screen is only kept on while a video is playing.
- No payment, ever. The app is completely free, with no ads and no in-app purchases.
The app only stores your list of collections, plus small thumbnails and folder lists in its private cache (about 300 MB at most, never backed up; clear it in Settings). No photos are copied. Cloud backup and device transfer are disabled. For the full statement, see Privacy & Disclaimer.
Responsible use & your responsibility
Media Viewer is a hobby and educational project. The Delete button deletes a photo or video permanently (there is no recycle bin), so please keep a backup of photos and videos that matter to you.
The app is provided "as is", for learning and experimentation, without any warranty. Please read the full Privacy Statement & Disclaimer before use — by installing or using the app you accept those terms.
Images